Don’t Let Grout Stains Win: How to Clean Grout on Floor Tiles Easily
Dec 19, 2025
If there is one thing that can make even the most beautiful tile installation appear old, dull, or dirty, it is stained grout. Even with regular cleaning, grime settles between porous grout lines, making them appear discolored and unpleasant. The good news? You don't have to rely on expensive tools or professional cleaners to get fresh, bright-looking floor tile. With the right method, learning how to clean grout on floor tiles is easy and stress-free.
Key Takeaways
-
Grout is porous and prone to staining, so cleaning it regularly is necessary to maintain the brightness of your floors.
-
The basic steps for effective floor grout cleaning include using the right cleaner, gently scrubbing, and rinsing with clean water.
-
Match the cleaning method to the stain level, use mild cleaners on light dirt, baking soda paste for moderate stains, and peroxide cleaner for deep discoloration.
-
Avoid using acidic cleaners such as vinegar on natural stone installation, as they may etch and damage the tile surface.
-
Seal grout every 6–12 months, and maintain floors regularly to minimize stains and discoloration.
This comprehensive guide breaks down all you need to know, from tools to DIY solutions, common mistakes to avoid, and long-term maintenance tips.
Tools & Cleaning Supplies You’ll Need

Before getting into the “how to clean floor grout” agenda, gather all the tools and supplies you will need. Preparing in advance saves time and helps you work more efficiently.
Basic Tools & Cleaning Supplies:
Soft-bristle brush
Microfiber cloth/ Sponge
A bucket
Spray bottle
Warm water
Latex gloves
Soft Microfiber Mop
Cleaning Agents (use depending on degree of stain)
Baking soda
White vinegar
Hydrogen peroxide
Oxygen bleach (such as OxiClean)
Mild dish soap/ mild tile cleaner
Commercial grout cleaner (optional)
Having these items available will help you address everything from light to tough buildup.
How to Clean Grout on Floor Tiles Easily : Step-By-Step Guide

Here is the step-by-step guide you have been searching for, on the best ways to clean grout on floor tile without damage. These steps work well with a wide range of flooring materials, such as glass, ceramic, or porcelain tile. Remember to avoid using vinegar or acidic cleaners on natural stone like marble or travertine.
Step 1: Vacuum or Sweep the Floor
Sweep or vacuum the floor to ensure that the tiles are free of loose dust and grit. It prevents scratching the tile surface and ensures that you do not scrub dirt deeper into the grout lines. This simple step makes a big difference when learning how to clean floor grout.
Step 2: Pre-Wet the Grout Lines
Spray the grout lightly with warm water. This softens the built-up dirt and prepares the surface for a deeper clean. Pre-wetting loosens grime, especially grout lines that have been neglected for some time.
Step 3: Apply Grout Cleaning Solution
Choose your cleaner, either a DIY mixture, such as water and baking soda paste or a commercial grout cleaner. Generously spray the cleaning solution on the grout lines to break down deep-seated dirt.
Step 4: Allow the Cleaner to Sit
Allow the solution to sit for 5–10 minutes. For heavily stained grout, allow for 20 minutes. Doing this allows the cleaner ample time to break down tough grime deposits, making the next step relatively easy.
Step 5: Gently Scrub the Grout
Use a soft-bristle brush to gently scrub in circular motions and loosen dirt on grout lines The secret to learning how to clean dirty grout that has turned darker over time lies in steady scrubbing without damaging the surrounding tiles.
Step 6: Rinse Thoroughly with Water
Wipe away all the loosened dirt with a damp cloth, then mop your kitchen or bathroom floor tile with clean water. The rinsing will ensure there is no remaining soap residue, which can attract new dirt if not properly cleaned.
Step 7: Dry the Floor Completely
Dry the tiles with a clean microfiber cloth. If any area still appears to be stained, repeat the process until you get the desired brightness.
A Noticeable Difference After Just One Clean
Most people are amazed at how well this routine restores grout color. With the right tools and effort, cleaning the grout between tile joints becomes a fairly easy, effective, and satisfying task.
Best Grout Cleaning Methods for Different Stain Levels
Grout stains, whether on living room, bathroom, or kitchen floor tile, don't all come from the same source; some are caused by daily use, while others develop over years of spills, moisture, and dirt buildup. Being aware of this when learning how to clean grout on floor tiles will help you identify the right method for the level of stain. Here is a simple breakdown:
1. Light Surface Stains
These stains are the most common and occur from dust, spills, and splashes. They sit on the surface and are easy to clean.
Optimal Approach:
Mix warm water with a mild grout cleaner
-
Apply this mixture to grout and scrub lightly with a soft brush
This method is safe with any tile type and ideal for regular maintenance. It quickly refreshes grout without the need for strong chemicals or vigorous scrubbing.
2. Moderate Stains
On grout, moderate stains appear as dirt settles and changes or dulls the color. They may be tougher to remove than surface stains but still manageable.
Best practice:
Make a paste with baking soda and water
Apply directly to the affected areas
Scrub gently with a soft-bristle brush
Baking soda is a gentle abrasive that lifts dirt without weakening the grout
This is one of the safest ways to clean grout when discoloration starts becoming noticeable.
3. Deep, Resistant Dirt & Buildup
If the grout has changed color and buildup is visible, this means the stains may have penetrated further into the grout pores and immediate attention is required.
Optimal Approach:
Mix hydrogen peroxide with baking soda to form a paste
Apply, let it sit for a few minutes, and scrub gently
The cleaning paste will degrade the stain and bring grout to its original color. This is particularly helpful when day-to-day cleaning solutions do not work anymore.
4. Hard-to-Remove Stains & Discoloration
When grout hasn't been cleaned for the longest time, it can appear darker or heavily stained. This type can be tough to remove and needs a heavy-duty cleaning solution.
Best Approach:
Use oxygen bleach; for example, OxiClean
Apply it to the grout and let it sit for 10–15 minutes before scrubbing
Oxygen bleach is powerful but safe when applied correctly
Precautions:
Cleaning with oxygen bleach is highly effective, but some care is needed to protect from weakening the grout or affecting your health.
Avoid using oxygen bleach on unsealed or cracked grout, as it can penetrate too deeply and weaken the surface.
Avoid mixing oxygen bleach with other cleaners, including vinegar, ammonia, or chlorine bleach.
Make certain the room is well-ventilated and wear gloves to protect the skin.
Rinse thoroughly after use, so that any remaining residue will not attract more dirt later on.
Oxygen bleach lifts stubborn, aged stains and is one of the best methods for cleaning floor grout when deep discoloration needs to be removed.
5. Mold or Mildew Stains
These stains are common in kitchens, bathrooms, or other humid areas. Mold appears as dark spots, while mildew may look white or gray.
Best Method:
Spray hydrogen peroxide directly onto grout
Wash and rinse thoroughly
Hydrogen peroxide kills mold and helps brighten grout
While chlorine bleach is effective at removing mold, it should be used sparingly due to its weakening effects over time. Hydrogen peroxide is a safer and more effective choice for regular maintenance.
DIY Natural Grout Cleaning Solutions ( Safe & Effective )
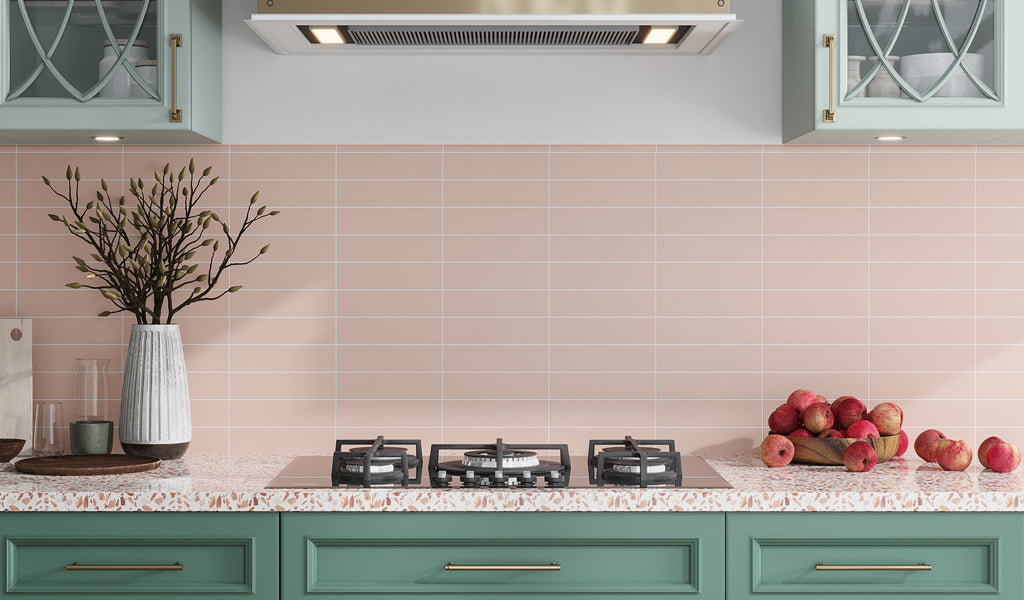
If you prefer natural, eco-friendly methods, these solutions are effective for everyday cleaning and light to moderate stains. They are gentle, affordable, and suitable for most tiles, like our Charcoal Gray with Fiery Copper 24x48 Matte Porcelain Large Format Tile.
1. Baking Soda + Vinegar
This mixture is great for lifting dirt and grime naturally.
How to Use:
Sprinkle baking soda along grout lines
Spray vinegar over the baking soda
Allow the mixture to foam for approximately 5 minutes
Scrub gently and rinse with clean water
Remember: Avoid this method for cleaning grout used for stone tile installation since vinegar is acidic and can etch or dull the tile surface.
2. Lemon Juice Spray
Lemon acts as a natural brightener and deodorizer.
How to Use:
Squeeze fresh lemon juice into a spray bottle
Mist it onto the affected area and scrub lightly
Rinse thoroughly with clean water
This DIY cleaning method is perfect for small touch-ups or just maintaining the look of new grout from day to day.
3. Castile Soap + Warm Water
A very simple, yet effective cleaning option.
How to Use:
Mix 1 tablespoon of Castile soap with warm water
Apply to grout and scrub with a soft brush
Rinse thoroughly with clean water
It’s an ideal cleaning solution for regular maintenance, especially if you want to avoid using strong chemicals.
How to Keep Floor Tile Grout Clean Longer

You have finally learned how to clean grout on floor tiles, now it is time to make your results last. Proper maintenance not only keeps grout brighter longer, but it also reduces how often you deep-clean. Here is how to protect and maintain tile grout the right way:
1. Seal Grout Line Regularly
Cement grout is naturally porous, meaning it can easily absorb moisture and dirt. This is why it is important to seal grout on tile floor. Applying a high-quality grout sealer creates an impenetrable barrier that prevents infiltration. Reapplication of grout sealer in bathrooms, kitchens, or high-moisture areas should be done every 6–12 months. The grout must be perfectly clean and dry prior to applying the sealant.
2. Sweep or Vacuum Daily
Dirt and dust settle quickly onto grout lines, creating buildup over time if not properly cleaned. A daily quick sweep or vacuuming keeps debris from embedding itself. Pay extra attention to entryways, hallways, and other high-traffic areas.
3. Mop With Mild Detergents
When determining the best way to clean floor grout, gentle cleaners should be your go to. Avoid using harsh or acidic products as they can weaken and damage grout. Use warm water with a mild grout cleaner or dish soap.
4. Dry Your Floors after Mopping
Leaving your tile floors wet may seem harmless, but standing water can slowly seep into the grout. After mopping, make sure to use a dry microfiber mop or towel. This prevents moisture build-up, the growth of mold, or grout darkening.
5. Place Doormats in Key Areas
One of the easiest ways to keep grout clean is by stopping dirt before it enters your home. Use mats at entrance doors. Consider washable rugs in high-traffic areas to reduce tracking.
6. Spot Clean Weekly
Ignoring light dirt turns it into deep stains. Quick weekly touch-up keeps grout bright and fresh. Use a soft brush and mild cleaner. Focus on high footfall and wet areas where staining can easily occur.
When to Regrout or Replace Grout Entirely
Sometimes, cleaning grout is just not enough, especially when the damage is too advanced. If you reach this point, learning how to regrout tile will help you restore your flooring. When grout is old, cracked, or constantly affected by mold, regrouting may be the only way to update your space.
Replace old grout if you notice the following:
Grout crumbles when touched, as it implies that it has deteriorated and has lost its strength.
Visible cracks can allow moisture, dirt, and bacteria to seep to the surface beneath.
Mold that keeps recurring indicates that the grout is damaged even with sealing.
When stains do not lift even with the best cleaning methods, replacement often becomes the best solution.
Loose or shifting tiles are an indication that structural integrity of the installation has been compromised. In such situations, the tile and its substrate may require repair by a professional.
Why Regrouting Tiles Helps
Regrouting means more than improving the appearance; it restores the strength, safety, and cleanliness of your floors. It is especially important in bathrooms, kitchens, and outdoor areas where grout may wear sooner than later.
A new layer of grout means:
A cleaner and brighter surface
Long-lasting tile installation
A renewed, modern look
Conclusion
Maintenance is simpler than you might imagine if you know how to clean dirty grout the proper way. With a little effort, your tile floors will look brighter, fresher, and well cared for. Attending to stains or discoloration promptly and sealing grout periodically makes all the difference. Begin today and enjoy floors that look clean, inviting, and beautifully maintained.Frequently Asked Questions:
1. How do I clean grout in high-traffic areas?
Use the right cleaning solution, such as hydrogen peroxide with baking soda paste. Scrub gently with a soft-bristle brush and seal the grout afterwards to protect it.
2. What should you avoid when cleaning grout?
Avoid using harsh chemicals and abrasive tools that can weaken the grout and damage tiles.
3. How do professionals clean grout on floors?
Professionals typically use steam cleaners, specialized brushes, and commercial-grade alkaline solutions.
4. Why does grout stay dirty even after cleaning?
Grout is porous, and if not properly sealed, dirt seeps deep within its pores. Buildup and using the wrong cleaners also contribute to staining.
5. Will epoxy grout stain less than cement grout?
Epoxy grout is non-porous and highly resistant to stains, making it the best choice for bathrooms and kitchens.
6. Does sealing grout really make a difference?
Sealing grout prevents liquids, oils, and dirt from being absorbed, which keeps grout brighter and protected for longer.
7. How often should grout be resealed?
Seal grout every 6–12 months, depending on the area of installation and the environmental conditions.
8. Is there a difference between floor and wall grout cleaning?
Floor grout attracts more dirt, moisture, stains, and requires frequent maintenance. Grout used with wall tile doesn’t get as dirty, so gentle cleaners and lighter cleaning are usually enough.