How to Seal Grout on Tile Floor: A DIY Guide to Protect and Beautify Your Tiles
Feb 13, 2025 8 minute read
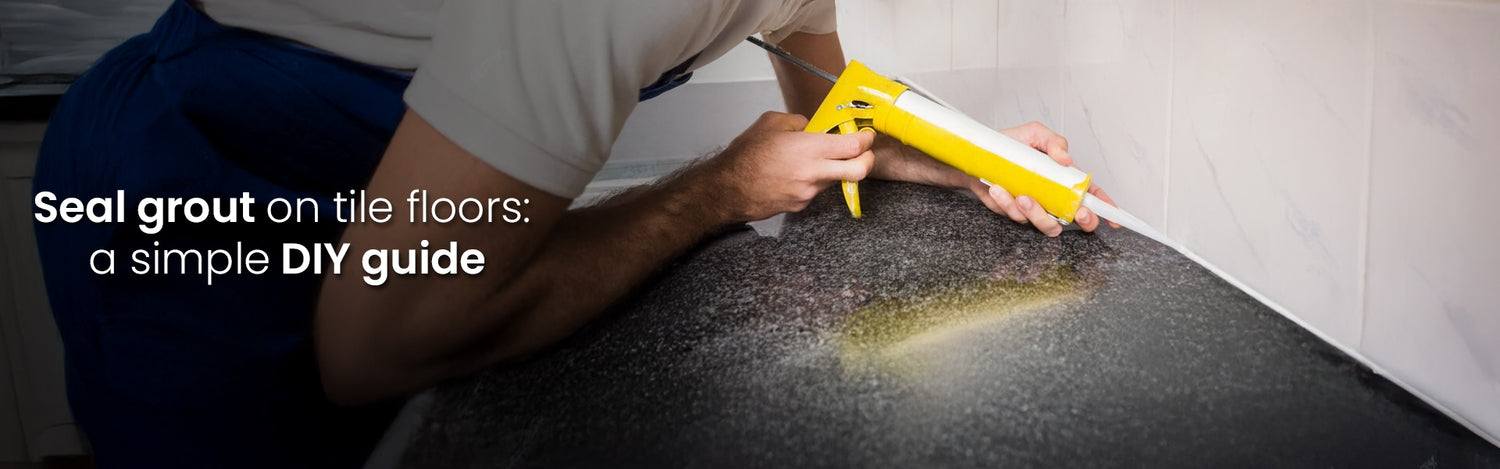
Grout is an essential part of tiling. By filling the gaps between, it provides strengthening stability and shields against moisture and dirt from seeping through. And yet, unprotected grout is prone to staining and deterioration, leaving your tiles looking aged and neglected. This is where a grout sealer becomes critical for a successful installation process.
If you’re wondering how to seal grout on tile floor, this blog post explains everything in detail. We’ll look at the basics of grout, the best grout sealers, and walk you through the process of sealing grout.
Recognizing the Vulnerability of Grout
Before we dive into “how to seal tile floor grout,” let’s first look at what grout is and why this material that holds wall, backsplash, and high-traffic tile installation together needs protection to maintain its integrity.
What is Tile Grout
Made from a mixture of cement, water, and sometimes sand, grout serves three purposes in the tile installation process. It is used as a filler between the tile joints, holding each individual piece in place, and preventing them from rubbing against each other.
It also forms a barrier that averts moisture, stains, dirt, and other contaminants from penetrating and reaching the surface behind the tiles. Lastly, using grout results in an aesthetically pleasing finish. Many come in varying colors to match different styles of tiles.
For instance, white tile can be complemented by white grout to achieve a seamless finish. Black tile creates a striking and dynamic contrast with white grout. To learn more about choosing grout color, check out our Ultimate Grout Color Selection Guide.
What Causes Grout Damage
Cement-based grout, which can be sanded or unsanded, is highly porous and prone to moisture infiltration and staining. The only exception is epoxy grout, which is a resilient option that is impervious and can withstand high footfall. Although more expensive, it does make for a worthy investment down the road as it does not need to be sealed.
The best grout sealer will aid with the following common causes of damage:
- High impact on high foot traffic flooring
- Moisture absorption and discoloration
- Mold and mildew caused by contaminants
The Benefits of Sealing Grout
So why is this “how to seal tile grout” guide important? Because sealing cementitious grout will reinforce the rigidity and strength of your tile installation. Porcelain, glass, and ceramic tile are non-porous and can be used in bathrooms and kitchens unsealed, but grout isn’t. Adding a protective sealant layer during installation and periodically after to grout lines is an effective way to repel liquids, make upkeep easier, and give a visually appealing design.

How Often Should Grout Be Sealed?
During initial tile installation, use long-lasting sealer on grout immediately after it cures. To check if it needs resealing, flick a few drops of water on the grout and see if it sits or disappears. Absorption of water means it’s time to reseal. As a rule of thumb:
- grout on high-traffic flooring should be resealed every six months or at least once a year.
- grout on low footfall tile floor can get away with being resealed every two years.
Types of Grout Sealers for Tile Floor Installation
Choosing the best grout sealer depends on a few factors, including the area of installation, longevity, and ease of application. Before purchase, carefully read the label to confirm that the product is right for your project. If you’re dealing with cement-based grout, there are two categories of protective sealants to consider: penetrating and non-penetrating sealers.
Penetrating Sealer: Also known as impregnators, penetrating sealers seep deep into the pores of the grout, forming a breathable shield that keeps moisture out. The sealant is made from silicone or latex, and it locks in without altering the appearance of the grout or leaving behind a surface film. This type of sealer is best for installations that are in constant exposure to water.
Membrane-Forming Sealer: Non-penetrating sealers, on the other hand, create a protective coat on the grout surface that’s resistant to water penetration. While they work well for low traffic areas, they can trap dirt and stains on busy flooring. To add to that, membrane-forming sealers often have added pigments that add a slight sheen to the grout or alter its color.
In summary, performance is key when selecting a grout sealer. Ensure compatibility with the grout and tile by checking the product specifications. Considering that VOCs (Volatile Organic Compounds) are toxic when inhaled, the best sealer is also one that’s labelled as non-toxic and won’t compromise air quality with harmful chemicals.
DIY Step-by-Step Guide to Seal Grout
Regardless of tile flooring material, the steps involved in sealing grout lines are the same. This is a DIY project that can be completed within a few hours. Assuming you’ve already chosen a sealant, below is how to seal grout on tile floor:
1. Gather your Sealing Supplies
Have all the necessary supplies ready: clean cloth, protective gloves, grout cleaner, grout sealer, and applicator.
2. Prep and Clean the Grout
- If sealing a newly tiled floor, allow 24-48 hours for grout to fully cure and dry.
- If resealing an existing installation, thoroughly clean the grout lines. This can be done with a grout cleaner specially formulated to remove dirt, grime, and stains.
- Allow the grout to dry before proceeding. Applying a sealant to damp grout will prevent it from soaking in or bonding to the surface.
- Once the grout is dry, inspect for cracks and damage. Working on an old layer of grout will require that you fill any cracks with replacement grout.

3. Apply the Sealer on Grout
- Working in small areas at a time, dip a foam-rubber brush into the sealer and evenly coat the grout lines moving from one end to the other for the best coverage.
- Have a dry cloth in hand to wipe off excess from the tile before it dries. Left unattended, a sealer can leave a hard-to-remove hazy film on the tile surface.
- Allow an hour (or recommended time) for the sealer to fully saturate the grout. Apply the second coat following the same method as before. Check product label for the number of coats needed to ensure optimal protection.
- Allow sufficient time for the sealer to cure and dry. Some sealers can take up to 48 hours before exposing floor tile to water or heavy use.
- You can test the effectiveness of the sealer by placing a few drops of water onto the grout line. If water doesn’t puddle over the treated area, apply another coat of sealant.
4. How to Maintain Sealed Grout
Proper cleaning and maintenance are essential to keep sealed grout in a pristine state. Here’s how you can care for your tiled floors:
- Clean grout lines regularly with a solution of warm water and a mild, pH-neutral cleaner.
- Use a soft mop to avoid scratching the tile and steer clear of harsh cleaners as they can degrade the sealant over time.
- Avoid abrasive tools as they can cause the grout to crack and allow water damage below the tile. Use a soft sponge or soft bristle brush to spot clean stains.
- Wipe spills promptly to prevent stains and discoloration.
- Inspect your tile flooring regularly for wear or damage. Look for areas where grout is cracked or eroded or where the sealer may have worn off and take actionable steps to remedy the situation.
- The sealant will begin to wear down over time. Reseal grout to retain durability.
Conclusion
Sealing grout can be a DIY project that visually elevates and prolongs your installation. This “how to seal grout on tile floor” guide will ensure that you enjoy the benefits of well-maintained tiles for years to come. For the best results, make sure to gather the right supplies, choose a quality sealant that’s compatible with your project, prep the surface, and follow the above steps to get the job done. You’ll need to reseal your flooring at least once a year and practice proper upkeep so your tilework stays in excellent shape.


