Learn How to Cut Backsplash Tiles Without Breaking Them
Mar 09, 2026 9 minute readCutting tile may seem like an intimidating task, especially when working with materials such as porcelain or glass. The good news, though, is that you can learn how to cut backsplash tile safely and cleanly. This step is essential to achieving a professional finish in the kitchen or bathroom. As a first-time DIYer looking for guidance on how to go about your project, you have come to the right place.
Key Takeaways
- Planning the layout and smoothing tile edges helps create a neat, professional finish.
- Accurate measuring is one of the important steps to ensure a precise backsplash tile cut.
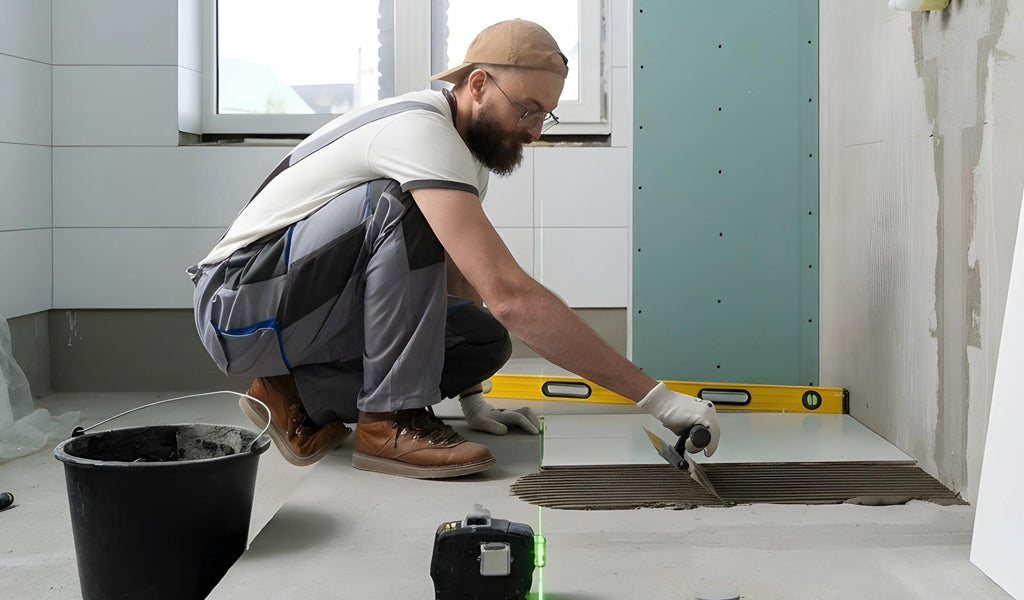
Step-by-Step Method to Cutting Backsplash Tiles

Cutting backsplash tile may seem like a daunting task at first glance. But with the right tools and a little patience, the process becomes much easier. Whether working with ceramic, porcelain, or glass tiles, precision is the answer to a professional finish.
Here are the steps to follow:
Step 1: Measure and Plan the Layout
When learning how to cut tile backsplash, the first step includes careful measuring and layout planning. Before making any cuts, study the wall area and pay close attention to cabinets, countertops, outlets, and switches. Take accurate measurements and determine where each tile will fit. It is best that you dry lay the tiles before applying the adhesive to make use of as many full pieces as possible.
Step 2: Mark the Tile Clearly
Once you have confirmed your measurements and the layout requires cut pieces, mark a line on the tile for cutting. Use a pencil or a washable marker for accuracy. If you are making an L-shape cut, clearly mark both lines. Always double-check the tile’s orientation before marking, especially for patterned designs.
Step 3: Select the Right Cutting Tool
The appropriate cutting tool will vary depending on the material that the tile is made of. For example, ceramic can be cut using a tile cutter, which scores the tile and snaps it along the edge. Porcelain, marble, and glass tile will need to be cut using a wet saw to get a smooth edge without chipping. Tile nippers will be useful in fine-tuning the tile after cutting to get the desired shape.
Step 4: Cut the Tile Carefully
To make straight cuts, place the tile firmly against the guide of the backsplash tile cutter. The surface should be scored once with smooth and even pressure from one end to the other. After scoring, snap the tile with pressure. It will break cleanly if the cutting process is done correctly.
For porcelain, glass, and marble, which are strong and dense, a wet saw is a better option. Turn the saw on before pushing the tile toward the blade. The tile must be inserted slowly into the blade, with the cutting action done by the saw. Do not use excessive pressure because this can cause the tile to crack.
Step 5: Cut Tiles Around Outlets and Switches
Outlets and light switches are very visible, and cutting tiles around these areas requires extra care. Determine the exact position of the outlet box in relation to the tiles. You then transfer these dimensions carefully onto the tile, marking where you want to cut. You can then cut the tile using a wet saw, making straight cuts along the lines you have marked. You might need to make several relief cuts, which are small cuts parallel to the lines, before you can safely cut out the middle portion of the tile. You can then use tile nippers to refine the edges.
Step 6: Smooth the Tile Edges
The cut edges of the tiles may be sharp or slightly rough. You can smooth the edges using a rubbing stone or sandpaper with a fine grit. Once done, remove the dust and proceed to cut and prepare all tiles before placing them in their final positions. It is important to do a dry fit of all tiles to check if they fit the area according to measurement, especially around outlets and switches.
By following all the steps above, you will be able to make a clean tile cut, even around intricate areas such as outlets and switches.
Tools Required to Cut Backsplash Tiles
Tape measure
Pencil or tile marker
Straightedge or carpenter’s square
Manual tile cutter (tile snap cutter)
Wet tile saw (with diamond blade)
Tile nippers, rotary tool
Angle grinder
Tile file or rubbing stone
Safety glasses
Dust mask and work gloves
Ear protection
How Do You Measure and Mark Backsplash Tiles Correctly

The planning and preparation of your backsplash tiles begin with understanding the layout of the surface. This is done by determining where you need to start tile installation, which is best done at the center of the wall. This approach makes use of as many full tile pieces as possible. Dry lay the tiles with spacers between them before applying adhesive.
Next, use a spirit level to draw a reference line, rather than using the countertop, which may not be perfectly straight, as a guide. The line will help you to ensure that the first row is even, and all other rows will follow a set pattern. When working on the edges and corners, you can determine where cuts are necessary by calculating the remaining area and subtracting the width of the grout line, and then drawing this onto the tiles with a pencil for an accurate cut.
When working around outlets and switches, carefully trace the exact area onto paper, then transfer it onto the tile surface. Turn off the power and remove cover plates for accuracy. Finally, dry-lay all tiles before installation to confirm alignment, spacing, and cut pieces to achieve a polished backsplash design.
How Do You Handle Corners and Edge Cuts in a Backsplash
To deal with corners and edge cuts, take proper measurements and use the right technique to give your backsplash a clean look. Install the tiles in the backsplash area and let them set. Once you get to the edges, it is necessary to cut the tiles to fit neatly into place. Leave a small gap where the backsplash meets the countertop or cabinets for expansion. Use caulk in these areas since it is more flexible, while grout is prone to cracking if there is any movement in the surface. For a clean and polished finish, you can use bullnose tile trim along the exposed edges. Our Sky Blue 0.5x12 Glossy Glass Pencil Tile Trim is a stylish choice for the backsplash, offering a high-end, neat look that conceals exposed tile edges. It works nicely with a variety of backsplash glass tiles, including Sky Blue 12x12 Glossy Square Glass Mosaic Tile and Sky Blue 3x12 Glossy Subway Glass Tile.
Tips to Avoid Chipping and Cracking While Cutting Tiles


To cut backsplash tiles without chipping or cracking, always use the appropriate tool for the material. Manual cutters work just fine for glazed ceramic tile, while a wet saw with a diamond blade works for porcelain or natural stone. It is also vital to measure and mark the tile correctly. Fully support the tile while cutting, allowing the cutting tool to do all the work. For glossy or polished tiles, such as the Eastern White 11x11 Polished Basketweave Carrara Marble Mosaic Tile, it helps to put painter's tape along the cut line to protect the tile's smooth surface from chipping.
Safety Precautions while Cutting Backsplash Tiles at Home
Learning how to cut tile backsplash can be safe and simple as long as you take the right precautions. Cutting involves power tools, flying debris, and sharp tile edges, and here are some of the safety measures to keep top of mind:
-
Protect Yourself: Wear safety goggles to prevent tile shards from getting in your eyes, a dust mask to avoid breathing in fine particles, and gloves to prevent cuts from tile edges.
-
Set Up the Workspace: Secure a stable worktop that is free of clutter. This will keep your tiles from shifting and your cuts from being inaccurate.
-
Choose the Right Tool: Ensure you have the right tile cutter for your tile and a sharp cutting tool. A dull tool will only lead to tile chips.
-
Handle Tiles Gently: Tiles break easily; handle them cautiously.
-
Manage Dust and Mess: Use a well-ventilated room and clean up small pieces of tile regularly to prevent accidents.
-
Watch Out for Electricity: If you are using a wet saw, keep your wires dry and not in contact with water.
-
Take Your Time: Being patient with the cutting process will help you avoid mistakes.
Conclusion
Learning how to cut backsplash tile is easier than it looks! The right tools, careful measuring, and proper cutting technique will ensure that you achieve professional-looking results without cracks or chips. Do it well, and your backsplash will look like it was done by a professional, no worries, just great results! If you are replacing an existing tiled backsplash, you may first need to remove the old tile. Our blog, How to Remove Tile Backsplash: Step-by-Step Guide, explains everything you need to know before installing new tiles.
Frequently Asked Questions
1. Can you cut backsplash tile without a wet saw?
2. Do you need to seal backsplash tiles after cutting them?
This depends on the tile type. Ceramic and porcelain tiles do not require sealing. Natural stone, such as marble tile, has to be sealed after cutting. This is because cutting can open up the pores on the edges.