Most Tile to Wood Floor Transitions Fail — Avoid These Mistakes
Apr 01, 2026 15 minute readA beautiful floor requires quality materials and a smooth transition. One of the most overlooked aspects of home design is the meeting point between tile and wood flooring. Both of these materials can be beautiful individually, but the connection between them is often the determining factor for how clean the entire room looks.
In fact, one of the most common mistakes made in home renovations is not the tile or the wood, but the meeting point. A well-planned floor tile to wood transition creates a natural visual flow between spaces, making it look professionally finished.
In this guide, we’ll cover the following: the importance of a tile to wood floor transition, handling height differences, the best transition solutions, and how to get the job done.
Why Transitions Matter Between Tile and Wood Floors
You’ve chosen your tile with care. Your layout has been well planned. Everything seems to be falling into place, except for the tile and wood floor transition. This pairing is far more than a small finishing touch. It’s the element that ties your flooring design together.
Without proper planning, the height and aesthetic changes between the two might cause disarray in the flow of the space. The grout lines and the color tones might not match the wood flooring, and that’s not the look you want.
Besides its aesthetic value, tile and wood floor transition also has an impact on how your space works. For one, uneven flooring edges may be a tripping hazard. Even small spaces may collect crumbs, dust, or moisture. Tile is rigid, but wood flooring tends to expand and contract with temperature and humidity changes. If not properly managed, this may lead to cracking or warping of your floor over time.
So, what is the significance of these connections? It is essential to create a junction between your tile and wood flooring to create a space that is not only comfortable and durable but also visually appealing.
Managing Height Differences Between Tile and Wood Flooring
Achieving a same-height transition between different flooring materials is ideal. However, in some remodeling scenarios, it may be challenging to avoid a sloped tile to wood floor transition, especially when replacing only a section of the floor. For instance, tile installations with thinset and underlayments often result in a higher floor than adjacent materials. It’s crucial to anticipate and address these floor-height differences during the planning stage. Floors can be “built-up,” but they cannot be “lowered” without additional labor and expense.
In cases where both tile and wooden flooring are used in the same space, there is sometimes a height difference between the two. This is because the two flooring options are different from each other. To achieve a smooth transition between the two, several factors and techniques are used. Some of these are explained below.
Thickness of Flooring Underlayment
Underlayment is the material used beneath the flooring. In most cases, wooden flooring requires an underlayment such as foam, cork, or plywood. These materials contribute to the height of the flooring. In tile flooring, cement board and uncoupling membrane are used, and they also contribute to the height. The thickness of the flooring underlayment should be taken into account before the installation process begins.
Tile Thickness
It is essential to understand that tiles vary in thickness depending on the materials used in making them. For instance, porcelain and ceramic tile tend to be thicker compared to most engineered wood floorings. It is crucial to select tiles that resemble the height of the wood floorings in order to minimize differences in height. During floor planning, take note of the tile’s thickness in addition to all the other floor layers.
Account for the Thinset
Thinset mortar is used when installing floor tiles. Although it is not thick, consider its effect on the overall floor height. As mentioned in the previous section, it adds a few millimeters to the overall floor height. Therefore, it is essential to consider it while calculating the floor height in order to achieve perfect alignment with the wood floors.
Drop-Down Floors
In some floor designs, lower the subfloor beneath the tile floorings to accommodate the tile and mortar thickness. This is known as a drop-down floor. It is essential to lower the tile floor to the same level as the wood floor.
Install Wood Flooring Before Tile
Another good approach is to install the wood flooring before installing the tile. With this approach, the height of the completed wood flooring is measured and taken into account while installing ceramic tile. This way, it is possible to control the height difference between the two flooring materials.
Decorative Transitions
In cases where there is still a height difference between the two flooring materials, decorative transitions can be used to achieve a smooth and attractive transition between the two flooring materials. Transitions, reducer moldings, and thresholds are used to bridge the height difference and protect the edges of both flooring materials.
In all these cases, it is possible to achieve a smooth and attractive transition between the two flooring materials by taking into account all these factors during installation.
Transition Options: Strips and Seamless or Strip-Free Solutions
A tile to wood floor transition can protect the edges of both materials while ensuring a seamless connection between them. There are essentially two types of transitions, namely strips and seamless or strip-free solutions, depending on the look and feel of the flooring.
1. Using Transition Strips
Transition strips are some of the most common solutions to the meeting point between tile and wood flooring. A transition strip is essentially placed at the junction of these two materials, thereby creating a division between them. This transition strip helps to cover the space required for expansion between these materials while ensuring the edges of these materials are protected from damage.
They are especially necessary in situations where there is a slight height variation between the tile and wood flooring. This means that different transition materials can be used, such as T-molding for floors of equal height or reducer strips for floors where one surface is slightly higher than the other. Tile trims can be used along the tile edge to prevent chipping of the tile and to create a neat look where the tile meets the wood flooring.
2. Seamless or Strip-Free Transitions
For a more modern and minimalist look, seamless or strip-free transitions are often preferred by homeowners. This approach enables the tile and wood floor coverings to meet at a joint without having a strip in between. When done properly, it enables a smooth flow between areas.
However, it is essential to note that seamless transitions demand careful planning and execution. For instance, it is essential to ensure that the height of the two floor coverings is aligned in such a manner that they meet at a joint. An expansion gap is often left between the two floor coverings and then filled with caulk to enable the floor coverings to expand and contract without sustaining any damage.
Direction and Alignment Rules for Tile and Wood Floors
The appropriate direction and alignment of tile and wood floors are essential for a smooth look in your space. There are basic guidelines that can improve the flow of your space, accentuate specific features, and create a seamless look.
1. Aligning Wood Flooring
The alignment of the wood flooring has significant effects on the appearance and feel of the room. It is recommended that the wood flooring be aligned in the direction of the longest wall to give the impression of length and harmony. Alignment of the wood with the main light source, such as the windows, helps to ensure the elimination of the appearance of joints and the enhancement of the natural grain, which further contributes to the aesthetic appeal of the room. It is also recommended that the wood flooring be aligned with the main entryway, which helps to guide the eye through the space.
2. Aligning Tiles
The alignment of the tiles has significant effects on the overall appearance and balance of the space. Tiles should be aligned with the center of the room or any focal point, such as the sink or fireplace, to ensure symmetry and balance. Tiles, like our Charcoal Gray 3x24 Matte Porcelain Plank Tile can be laid straight or diagonally to ensure a modern look and the impression of space, particularly in smaller rooms.
3. Transition Between Tile and Wood
In transitioning between tile and wood flooring, it is important to consider the alignment and visual flow. Ideally, the edges of the tiles should align with the direction of the wood planks for a professional-like look. In cases where there is a height discrepancy between the two flooring options, transition strips such as T-molding and reducer strips are used to ensure safety and aesthetics. In other cases, the grout and other design elements can be used to create a visual transition between the two flooring options.
4. General Rules for Combined Flooring
In terms of the combined flooring, the room’s design is important for aligning both the tile and the wood flooring. In rooms that are long and narrow, it is recommended that the direction of the wooden planks be aligned lengthwise. In square rooms, there is more flexibility and freedom. It is also important to consider the direction and alignment of the wooden planks to ensure consistency between different spaces and rooms. Additionally, other factors, such as focal points, such as the kitchen and the living room, should also be taken into account for alignment and visual aesthetics.
5. Practical Tips
Dry laying the tiles or the wood plank before fixing them helps to ensure proper alignment and flow. Spacers are useful in ensuring uniformity in the space between the tiles or the wood plank. The natural expansion of the wood should be considered, particularly when transitioning the flooring, especially if the flooring has to meet the walls or the doorway. Planning the layout, particularly in an angular room, will save on awkward cuts.
Tile-to-Wood Transitions in Open Floor Plans
1. Selecting the Right Transition
In using tile and wood flooring for open floor plans, it is important to select the right transition that will help achieve a smooth transition between spaces. Transitions do not only contribute to the visual appeal of the space but also serve to protect both the tile and wood flooring edges from potential damage. The most commonly used transitions for tile and wood flooring are T-molding, reducer strips, and seamless transitions.
2. Resolving Height Inconsistencies
One of the most common challenges associated with using tile and wood flooring is the height discrepancy between the two. Tile flooring is normally thicker than wooden flooring, especially when using stones and porcelain. To resolve the height discrepancy, there are two options: using a reducer strip that gradually transitions from the tile flooring to the wooden flooring, and adjusting the height of the wooden subfloor to match the height of the tile flooring.
3. Material and Finish Options
In terms of material and finish for the tile and wood transition, it is recommended that the material used should complement both the tile and the wood while also being durable enough to withstand the test of time. Some options for material and finish for the tile and wood transition include using ceramic or porcelain tile strips that match or complement the color of your tile, using stone trims for a more natural look, or using wood reducer strips for a more gradual transition from the tile to the wood.
4. Placement and Installation Tips
Transition strips are usually placed near doorways or the intersection of both flooring types. It is recommended that there be space left between the transition strip and the flooring for the movement of both flooring types with temperature and humidity changes.
Using Tile to Wood Transitions Around Wet Areas
It is crucial to use tile-to-wood transitions around areas of your floor that come into contact with moisture. These areas include bathrooms, kitchens, and laundry rooms. Wood is prone to moisture damage. Therefore, it is crucial to use transitions around areas of your floor where moisture is present to avoid damaging your wood floor. Excessive moisture in areas around your floor can cause warping of wood.
1. Choose the Right Type of Transition
Use materials that can withstand moisture and daily wear. Avoid using solid wood for transitions in areas where moisture is present. You can use materials like PVC, vinyl, and aluminum for transitions. These materials help in preventing moisture from damaging your wood floor.
2. Leave Space for Expansion
Wood floor is prone to expansion and contraction because of humidity. It is necessary to leave space for expansion when transitioning between tile and wood in areas where moisture is present. This space is filled by a transition strip. This strip helps in allowing your wood floor to expand without buckling.
3. Seal the Edges
Apply a waterproofing substance or even silicone caulk along the edge of the tile and the transition strip. This prevents water from leaking underneath the wooden flooring and causes damage over time.
4. Maintain Accessibility for Cleaning
Transitions in wet areas should be smooth and accessible for cleaning. A complicated design should be avoided, as it may trap dirt and other particles. A simple T-molding or reducer is best used for transitions in these areas.
Expansion Gaps, Installation, and Long-Term Maintenance
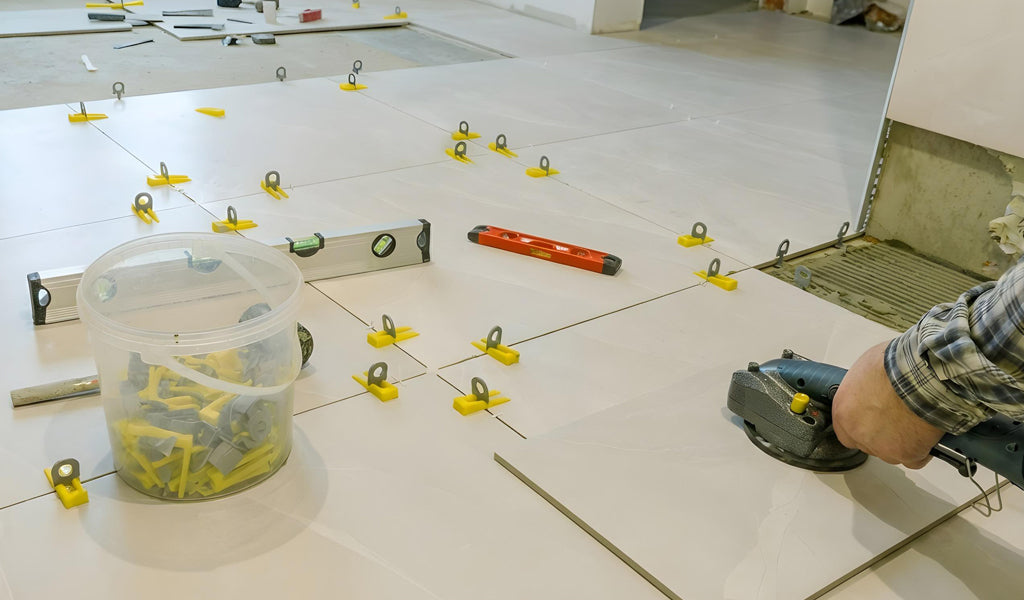
Proper tile installation includes allowing for expansion gaps, which help tiles adjust to temperature and moisture changes without cracking or lifting. All these factors contribute to durable and attractive tile surfaces.
1. Expansion Gaps
It is normal for floors to expand and contract with temperature and humidity fluctuations. Expansion gaps are openings between the edges of the floor and walls or permanent structures. Without expansion gaps, floors may buckle, crack or push against walls. Leave ¼ to ½ inch space around the room and fill it with baseboards, quarter rounds, and transition strips. Always follow manufacturer instructions for expansion gaps around engineered wood or laminate and tile installations.
2. Installation Tips
The subfloor needs to be clean, dry, and level before installing tiles. Unevenness may cause cracked tiles and creaking wooden floors. It is vital to ensure that bumps and dips in the floor are fixed before installing your floor. Although tile and wooden floors do not have the same height, make sure that floor installations are done with care. For instance, T-molding is used when the two floors have the same height, reducer strips are used when the wooden floor is higher, and underlayment is used for minor differences in height. It is important that wooden floor installations are parallel to the longest wall in the room.
Tiles should be aligned with major areas of traffic for a polished look. Use a quality adhesive for tile installations and the appropriate floor installation method for wooden floors to avoid floor movement, which may stress the tiles. Finally, remember to seal tiles and grout to prevent stains and water damage.
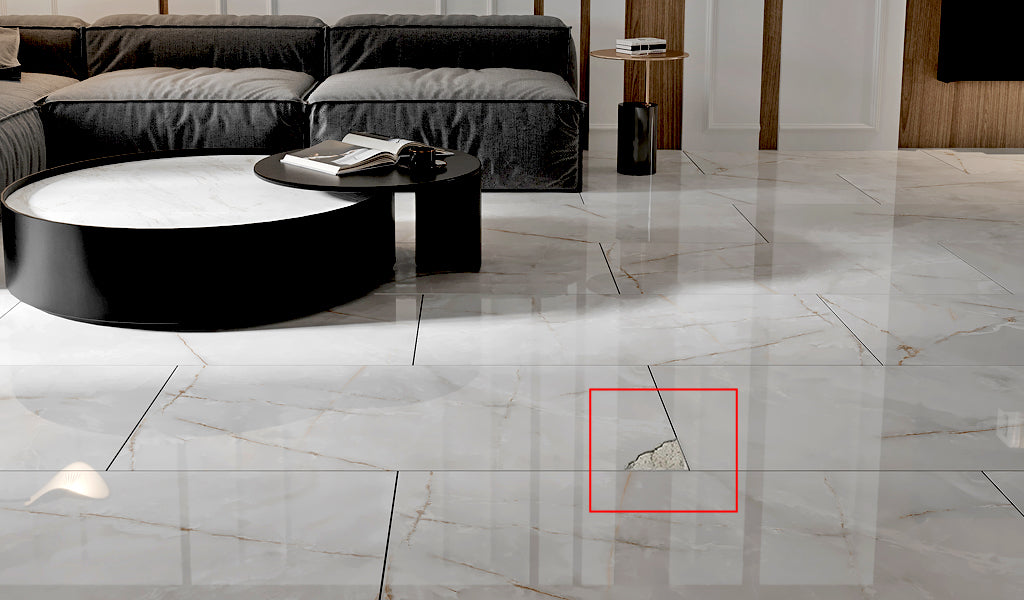
3. Long-Term Maintenance
To maintain your floor in the best condition, cleaning is important. Regular cleaning involves sweeping and vacuuming often, mopping tiles using mild tile cleaners, and using appropriate wood floor cleaning solutions. In addition, it’s essential to check the expansion gaps from time to time to ensure they have not closed too much. Maintain your floor by placing felt pads under furniture and avoiding dragging heavy furniture, especially across transition strips. If there is a crack in the tiles or warping of wood, it is essential to change them to maintain the floor’s appearance. Remember to control humidity levels between 30% and 50% to prevent wood from expanding and contracting, ensuring your floor is level and preventing long-term damage.
Conclusion
A well-thought out transition from tile to wood ties floor design together. With a thoughtful approach to height differences, alignment, and a suitable transition technique, you can design a safe and aesthetically pleasing transition from tile to wood. For more inspiration on incorporating wood-look tile into your interiors, explore our blog on Wood Accent Wall Ideas.